Performing "Check-ins", "Meetings", and "Notes" are core functions of Outfield and it's important that you know how to execute them. Let's take a look at Check-ins...
Here's a Short Video Explainer...
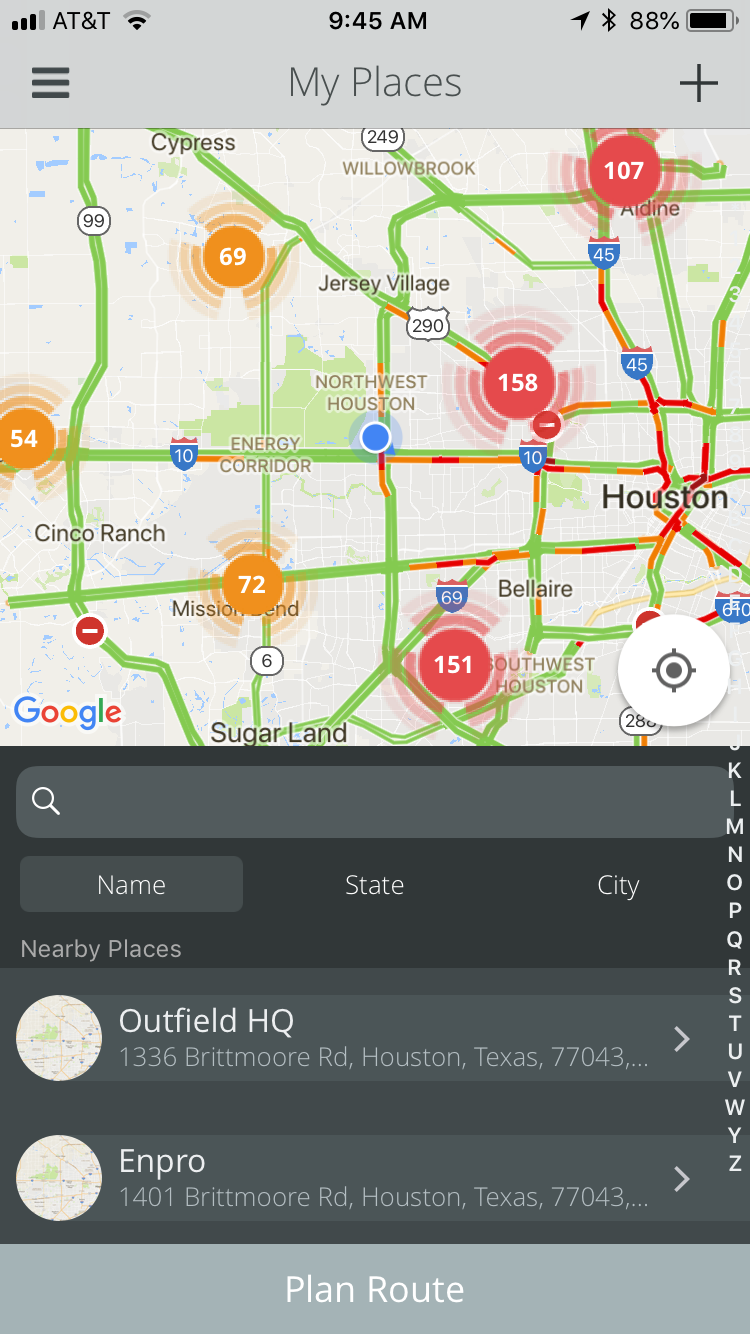
1. Start in "My Places"
To begin a check-in, you'll first need to select the location you will be visiting. Scroll through your account list and tap on a location.
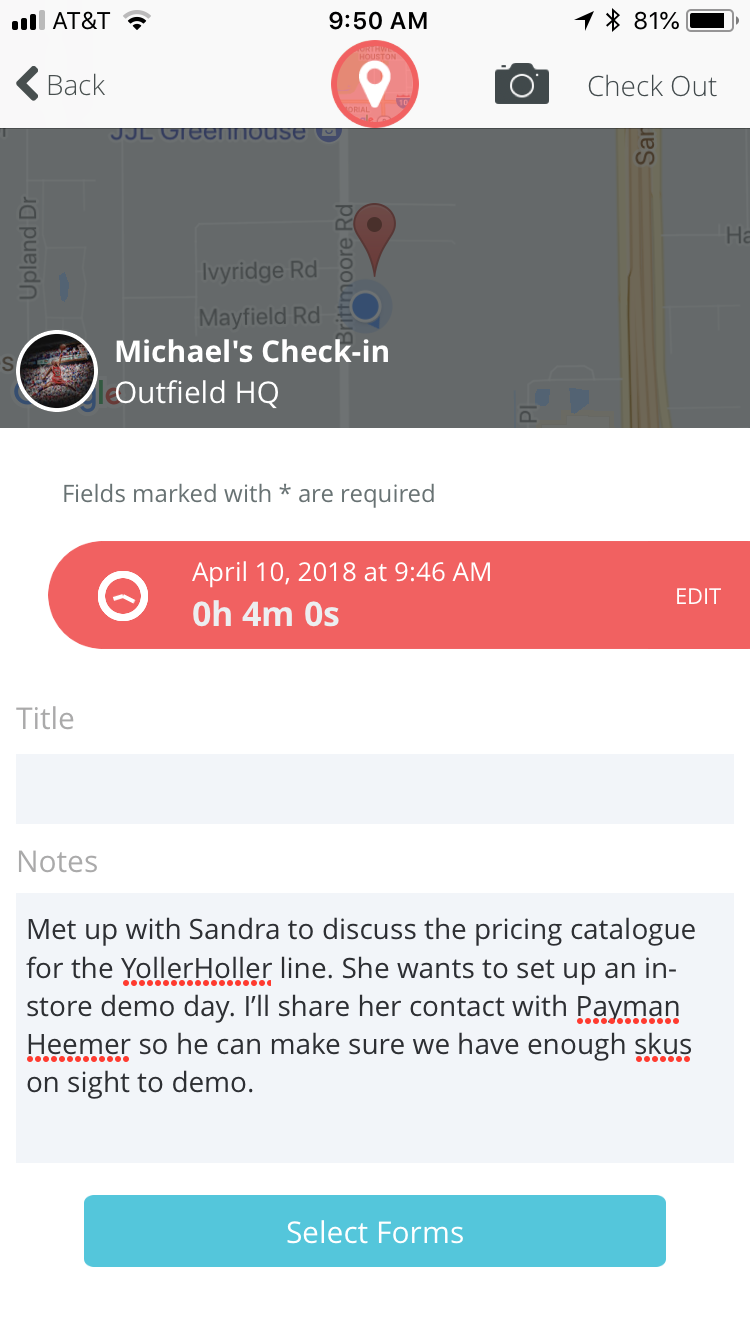
2. Tap the Red Check-in Icon
To jump into a check-in, tap the red "Pin" icon near the bottom of the screen.

3. Write some General Notes
Write any generalized notes to remind you about what was covered at the visit.
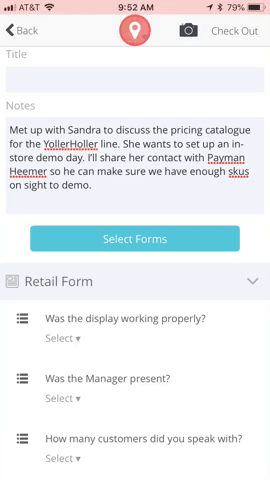
4. Select a Form and Fill it Out
Tap the blue bar that reads "Select Forms". Choose as many forms as you need and tap "Select". Scroll through the form and answer the questions as they appear.
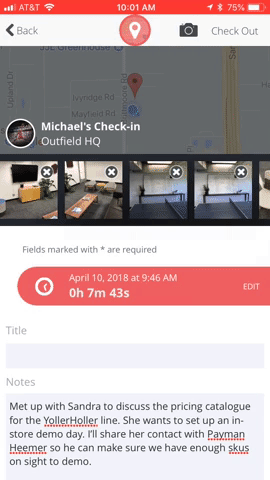
5. Attaching Photos
Attaching photos is super easy on Outfield. Just tap the camera icon in the upper right.

6. Tap "Check Out"
Once you tap "Check Out", you'll be asked to confirm your duration and you're done! Your check-in will sync up with the web-based version for your manager to see.
Check in from the Calendar
If you're the type to plan out your calendar (Which we suggest you do!) You can streamline your workflow by checking in straight from the calendar, just follow these steps:
1. Open your Calendar on the Mobile based version
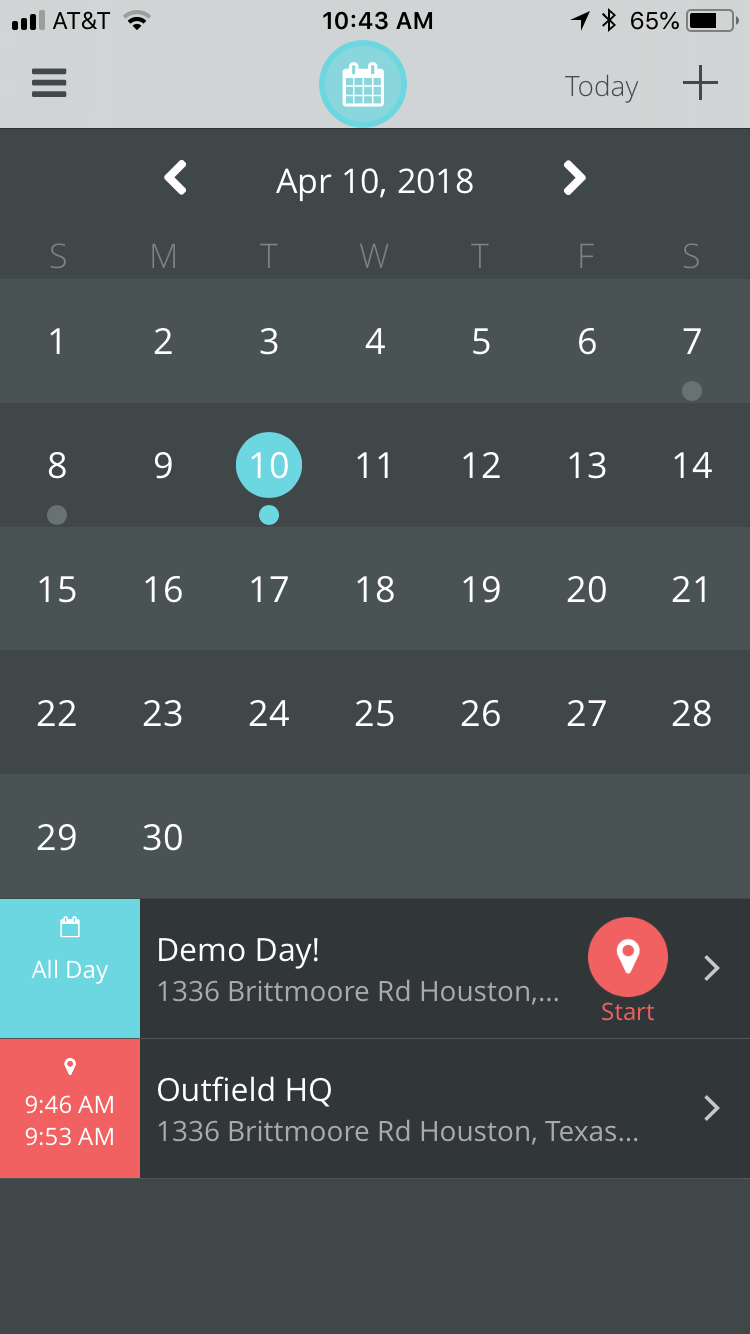
2. Tap the "Start Check-In" Icon
Below the Calendar you will see your planned events for a selected day. Tap "Start Check-in" and you will hop into your planned customer visit!

From there, follow the same steps from above! Checking in from your calendar is now easier than ever!
Drafts: What are they and why are they important?
Just like Gmail, Outfield saves your work in a "Draft". This is so you don't lose all of the hard work you did during your check-in. For more information on drafts, read this help article.
0 comments
Please sign in to leave a comment.